No products in the cart.
Blog, Eco Conservation, Play
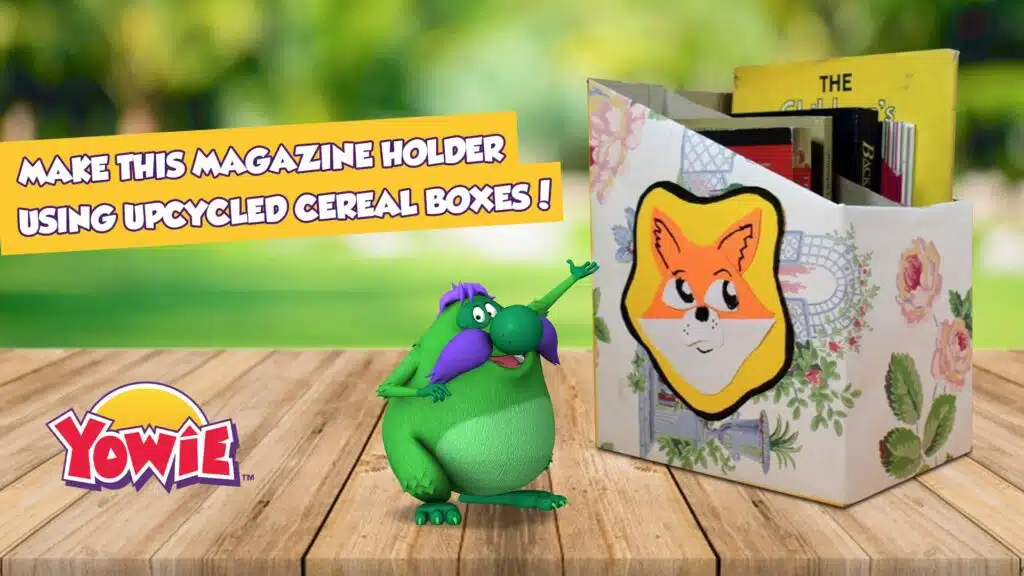
Get Organized With a Fun DIY Upcycled Magazine Holder
20
Aug
Aug
Some of the best types of activities allow us to use our hands to not only create new items but also make something truly useful. Upcycling allows us to take items that we might otherwise just dispose of and reinvent them into a new item that once again has value. When we choose to upcycle, we are helping to conserve the environment and avoid wasting resources as well as exercising our creative spirit.
We had great fun creating this DIY upcycled magazine holder. It provides a space for keeping books and magazines organized and within convenient reach while also offering the satisfaction of using/reusing items you already have at home, saving materials from the landfill. This upcycling project is also perfect for spending quality family time and creates an opportunity to talk about the value of upcycling with your child or children in a relatable way. We hope you have as much fun making it as we did.
DIY Upcycled Magazine Holder
DIY Upcycled Magazine Holder Materials
Here’s what you’ll need to complete this project:
-
- 2 empty cereal boxes
- Marker
- Ruler or straight edge
- Scissors or craft knife
- White glue, hot glue or tape
- Paper for decorating (This could be wrapping paper, construction paper, magazines, newspaper or anything you’d like!)
DIY Upcycled Magazine Holder Instructions
Here’s how we made our DIY upcycled magazine holder. Follow along to make your own.
Step One
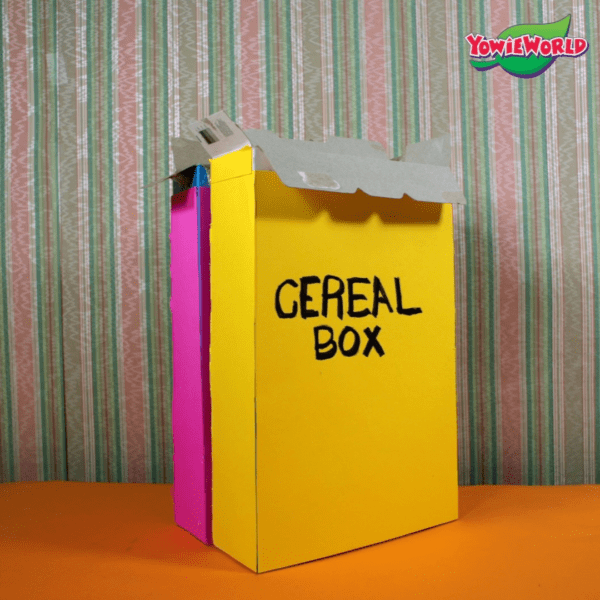
We started with two empty cereal boxes. We used regular sized boxes, but you can use the family-sized boxes if that’s what you have around the house. You can cut the large boxes down to size to make them a better size match for your magazines.

Step Two
We used a marker and a ruler (Any straight edge is just fine as well.) to draw a diagonal line across the front of the cereal box. We drew the line to end about 3 to 4 inches from the bottom. After that, we drew a diagonal line on the back of the cereal box, making sure to match our new line to the line on the front of the box.
We turned our cereal box to the label side nearest to the bottom of our diagonal lines. Next, we drew a horizontal line across the label to connect the two diagonal lines we created on the front and back of the cereal box. Our horizontal line started about 3 to 4 inches from the bottom of the box. See the photo or watch the video to get a better idea of how this should look.

Step Three
We started at the top of the same cereal box and cut along the lines we drew on both sides and on the label side. Scissors made for smaller hands are ideal for this step, so your little one can help with the cutting. This cut out box is one section of your magazine holder.
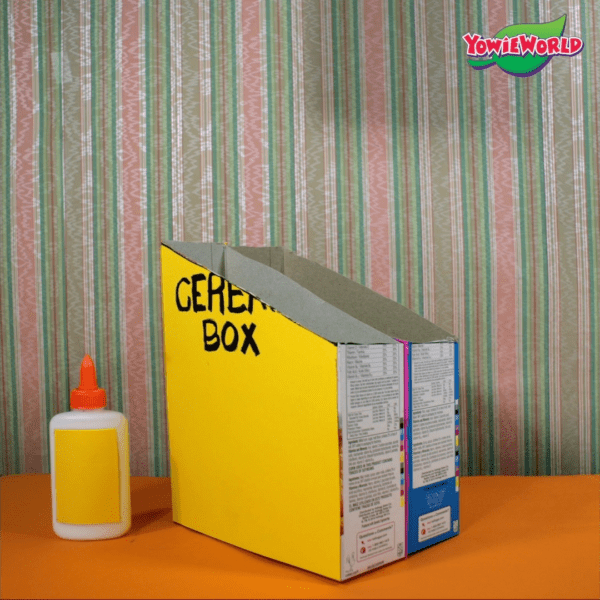
We needed to create a second section for the magazine holder, so we repeated steps 1 through 3 with our second cereal box. Be sure to carefully match up the lines on the second box with the lines on the first, so your magazine holder will be nice and even. If you need to, you can trim either box to make sure they match.
Step Four
Using ordinary white glue, we glued the two cereal boxes together so they made a nice holder with two compartments as shown in the video. Tape, a hot glue gun, or a glue stick will also work just fine.
Step Five
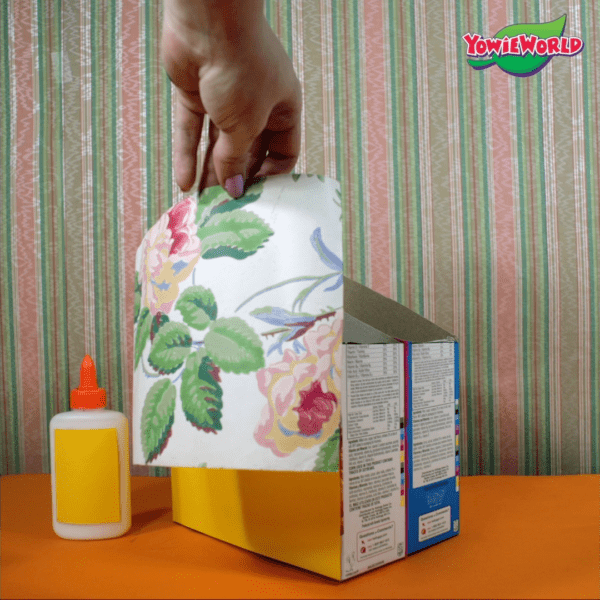
We cut out some decorative paper to cover our magazine holder and glued that onto the outer walls of our magazine holder. There’s no need to buy new paper for this. Look around the house for old wrapping paper, scrapbooking paper, even newspaper, magazine or comic pages will work. You can even draw on construction or regular paper and glue that on to decorate your DIY upcycled magazine holder.
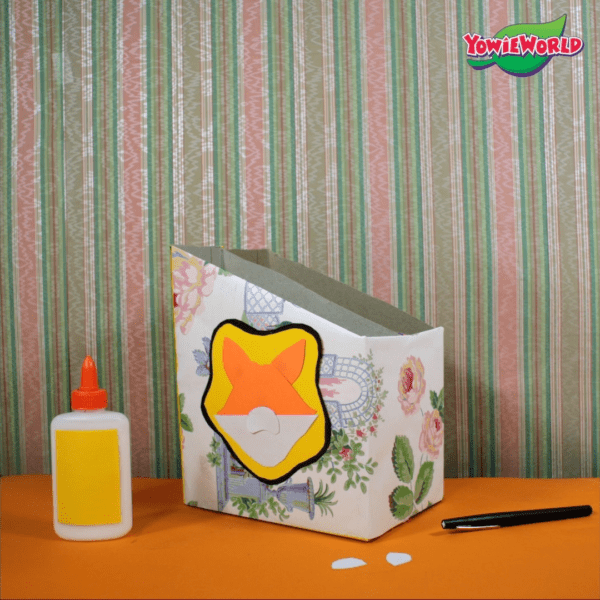
Step Six
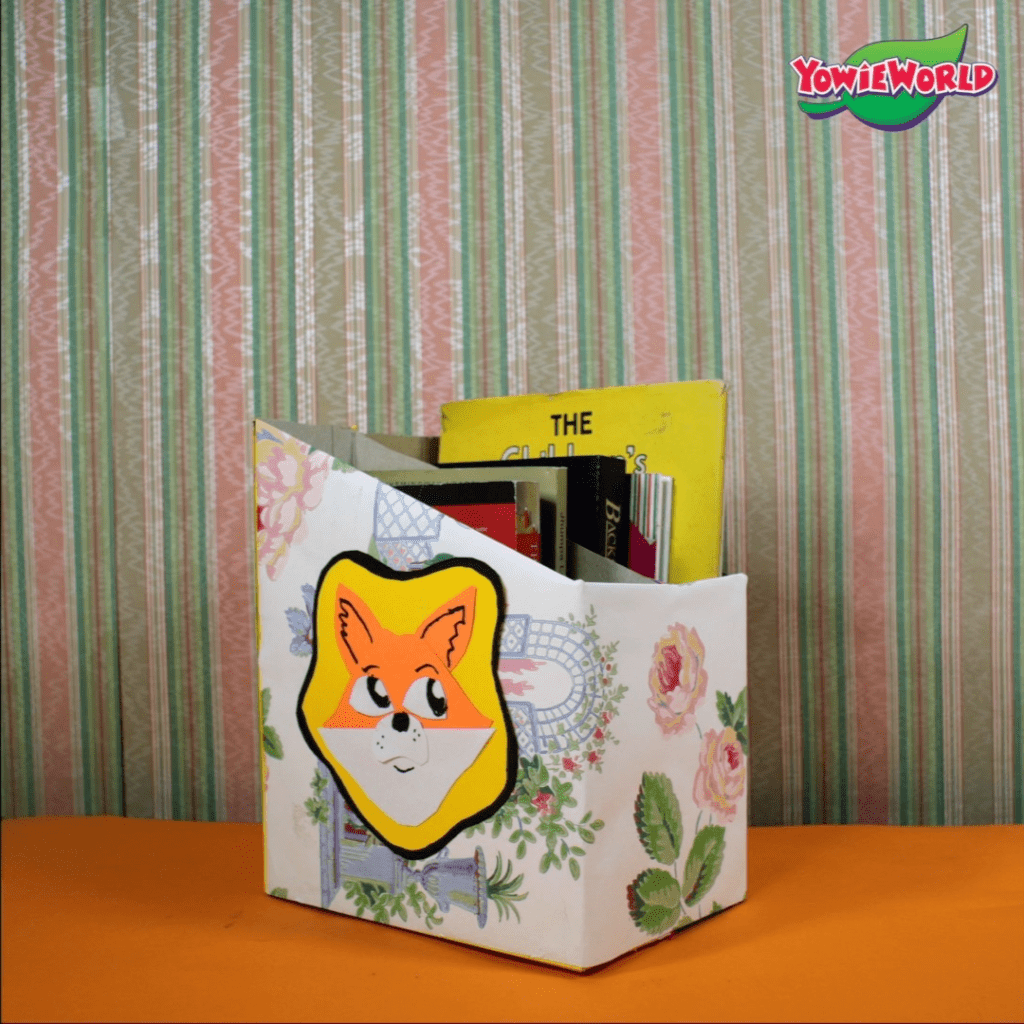
Using construction paper, a marker, and scissors, we drew and cut out two friendly fox faces–one for each side of our magazine holder– and glued them onto the magazine holder. Watch the video to see how you can use colored paper to create fun characters. We had a great time creating the fun fox you’ll see in the video. Use your imagination to choose something fun to embellish your magazine holder with, and then wait for the glue to dry before using your new holder. Hint: This is a good time to use that glitter glue or the paint pens you have tucked away in a closet or drawer. Or save your Yowie Surprise Inside Chocolate foil wrappers for a fun, shiny, Yowie-themed holder!
Follow the above steps to create your own DIY upcycled magazine holder. When you’re finished, be sure to share your creation with us and inspire others to have fun with this useful, upcycling project.
Once you make yours, share your photos with us on Instagram by tagging @YowieWorld. We can’t wait to see your eco-friendly creations!